Abilities in Core
Overview
An ability is anything that the player can do themselves.
Anytime that a player can do something more than just jump and crouch, that should be added to a Core project as an ability. Abilities are how a creator can add functions that a player can activate, and these abilities can be anything.
An ability could be to sprint, a cheering emote, the opening of a hidden menu; an ability can be anything that ought to happen on a button press or at a certain moment, repeatedly.
Info
Comparing with Unreal and other game engines, an ability is basically a fancier keyboard input. "Fancier" because it has events built-in that can be set at each phase of execution.
- Completion Time: 10 minutes
- Knowledge Level: No prior knowledge required
- Skills you will learn:
- How to create an ability
- How to use an animation
- How to set up UI connected to an ability
What is an Ability
In Core, an Ability is an object that holds information about how to behave when used. You can set how long the ability lasts for, how long until the ability can be used a second time, and all sorts of other properties.
While there are ways to utilize all these properties, for your first dive into abilities, we're just going to touch on the very basics.
Abilities can either be assigned to players at the start of a game, or when they equip a special item.
Tutorial
Adding a simple ability to a game is only a couple of steps. We'll go over how to activate an animation on a button press, with no coding necessary!
We're going to make a piece of equipment that the player can pick up, and when they do, they will gain a new ability.
For this tutorial, we are going to make the player wave hello.
Getting Started with Equipment
-
With Core open to a project, navigate to the Core Content tab, and scroll down to the bottom of the left side panel list to the GAME OBJECTS section. Select Gameplay Objects, and drag an Equipment Object into the project Hierarchy.
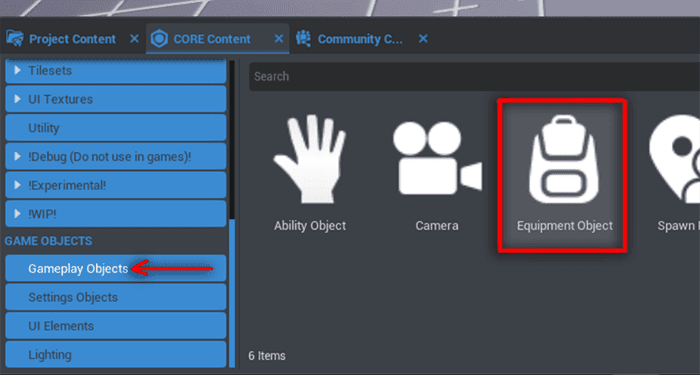
This will add an Equipment object to your project Hierarchy.
Equipmentcomes with aPickupTriggerthat allows players to equip the object when the player touches it.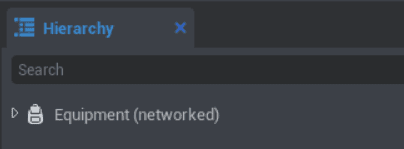
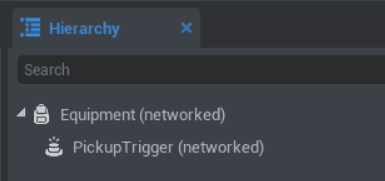
When you drag the
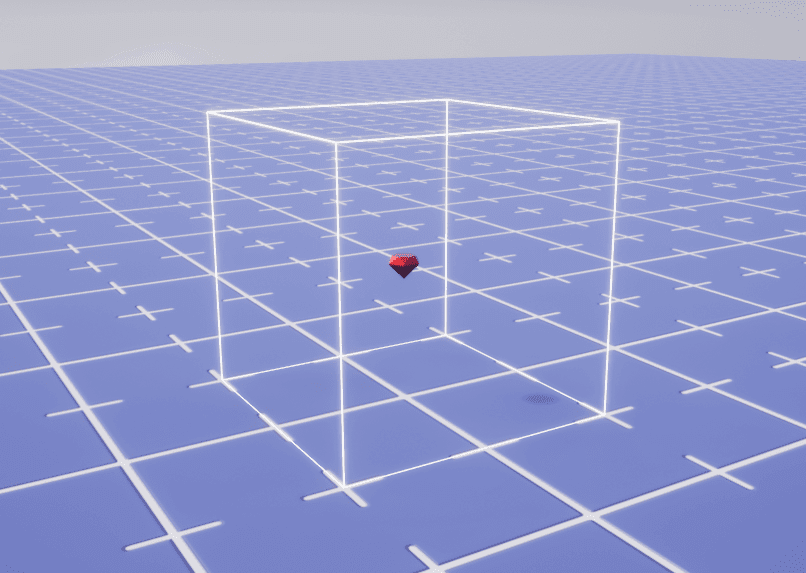
Equipmentinto the project Hierarchy, it will drop into your game scene at the location (0,0,0) which will look like the image below if you started in an empty project. If you do not see anything, press "V" on the keyboard to toggle the gizmos (all the game-only objects) on.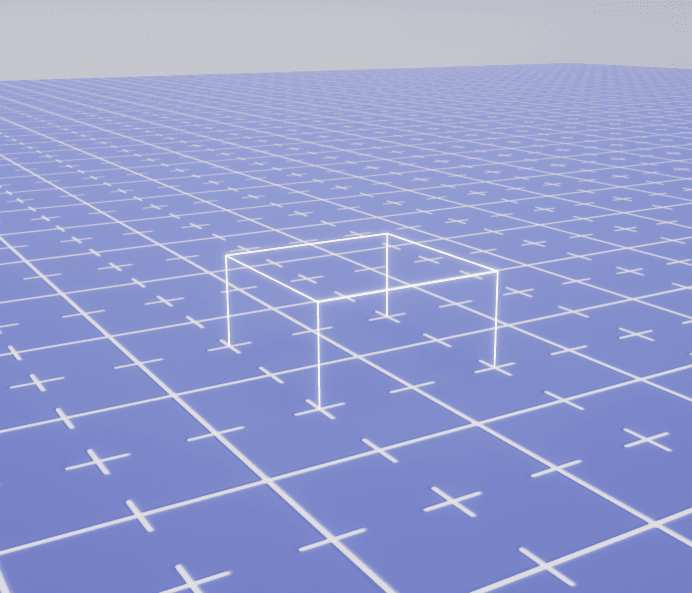
This box you are seeing is the
PickupTrigger, which is what allows you to pick up the equipment! When a player walks into this, they will immediately "equip" the equipment. -
With the
Equipmentobject selected in the Hierarchy, check out the Properties window. Scroll down to the section titled "Equipment".Change the Socket property from "head" to "pelvis".
The Socket property determines where the equipment will be attached to the player--we want the equipment to disappear, so for simplicity we will attach it somewhere that it will be hidden by the player's body.
Doing these first two steps will already let you pick up the
Equipmentwhen playing the game and walking through it--but it is hard to pick up something you can't see! -
To make this a more usable power-up object, let's add a model to it that players can see.
You can choose whatever you would like and would fit your game, but in my case I am going to use a classic gem.
-
In the Core Content tab, search for "diamond" and drag the
Gem - Diamond 6-Sided Polishedinto your Project Hierarchy.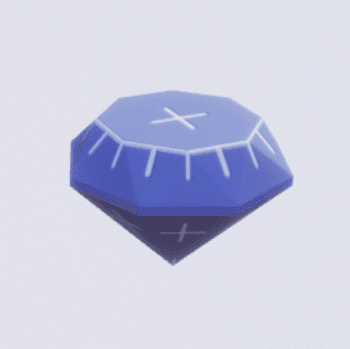
Feel free to change the material, or make the model suit your own game more. To learn more about how to make cool art & models in Core, read our Art Reference Guide or try a Tutorial.
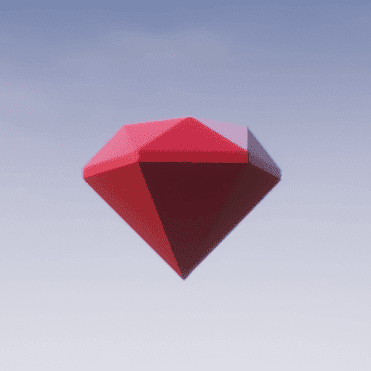
I went with a simple red gem, and made it a little smaller than the default diamond.
-
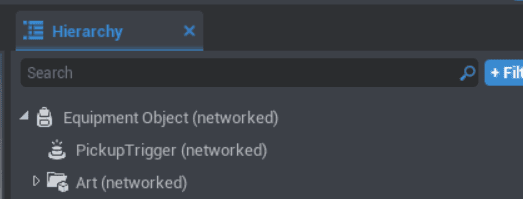
Drag it onto the
Equipmentobject and it will become a child of theEquipmentobject. It will prompt you to make the Gem Networked, and select "Make Children Networked" when this window appears.For better organization, right click the Gem object and select "New Group Containing This", and name it "Art".
-
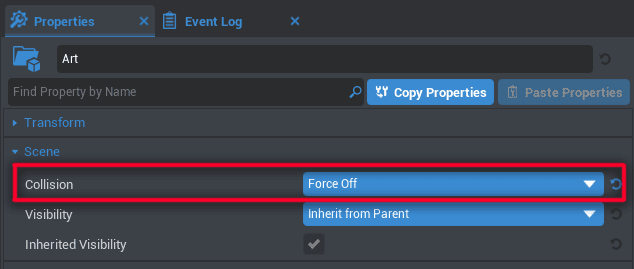
In the Properties window, scroll down to the Scene section. We need to change the Collision section from "Inherit From Parent" to "Force Off". This way the gem won't mess with your camera when it's attached to the player.
-
Right click the Art folder, and hover over "Create Network Context..." to select "New Client Context Containing This" to ensure better performance for the game by wrapping the art in a Client Context.
Now that we've created a visible object that can be picked up, it needs to do something!
-
-
Before we set up the animation to work, let's make sure everything is together. So far in this tutorial, if you have been dragging things directly into the project Hierarchy, they should all be sitting at the (0,0,0) position of the game world.
Make sure everything is together in the spot you expect, and that your art model and equipment trigger are in the same location.
You might even want to drag the whole thing upwards so that the trigger rests on top of the floor rather than halfway into the floor! When you want to move the whole thing, be sure to move the root folder: the
Equipmentobject.All together, it should look something like this:
-
Now to set up the animation! Navigate back to the Core Content tab and the Gameplay Objects section, and this time drag an Ability Object into your project Hierarchy.
-
Click on the
Abilityobject and drag it onto theEquipmentobject to make it a child of theEquipmentobject.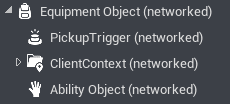
-
Rename the
Abilityobject to "Wave" by clicking on theAbilityobject and pressing F2. This can also be done by right clicking and selecting "Rename", or by changing the name at the top of the Properties window.
Now when the player picks up the equipment, they will automatically gain the
Ability! Of course, we still need to set it up to cause the wave animation. -
-
The
Abilityobject starts with default settings in the Properties window. To make our own wave, we only need to change two things:-
With the
Abilityobject selected, navigate to the Properties window and scroll down to the Ability section to change the Action Binding property to "Ability Feet".The Key Binding is which button will activate the ability. In this case, Ability Feet is the Shift key on keyboards.
-
Still in the Properties window and right beneath the Key Binding, change the Animation property to
unarmed_wave.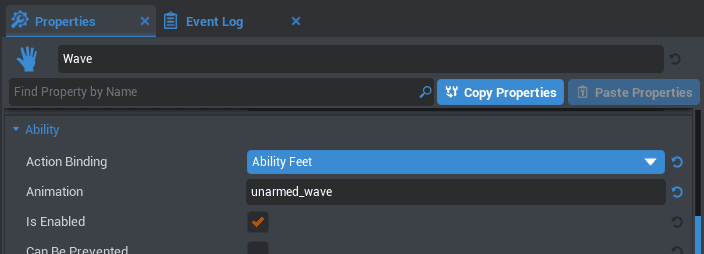
-
-
Abilities also affect how the camera works when the ability is used, and in the case of this wave animation, it would be nice to be able to face the camera when we do it. To make sure this happens:
-
With the ability selected, in the Properties window, scroll down to the Cast section. We want to change the Facing Mode from Aim to None so that our camera is not affected in that stage of the ability.
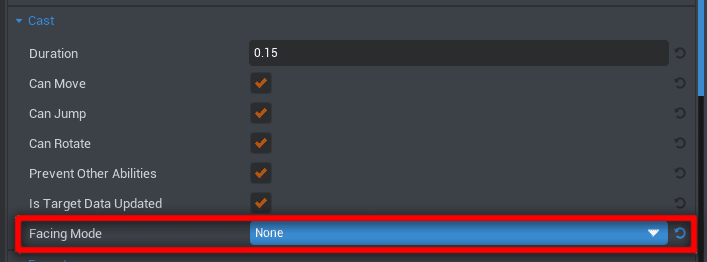
-
Do the same thing to the Facing Mode in the Execute section.
-
Now the ability is fully useable! When you play your game, pick up the object, and then press Shift, you will be able to wave hello!
Good Object Placement
If you haven't moved your Equipment object at all so far, your gem may be clipping into the ground! Feel free to move the whole Equipment object upwards to make it both easier to see and simpler to pick up.
If you'd like to change the amount of time between when you use (also known as Cast) an ability, this can be altered within the Ability object!
-
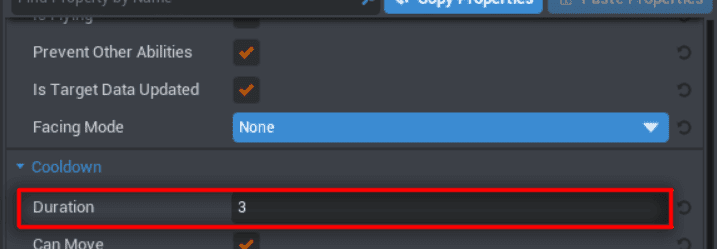
In the Properties window for the ability object, scroll down to the section called Cooldown.
-
Change the Duration property. This is in seconds, so by default 3 seconds must pass after using your dance before you can use it again.
Increase or lower this to suit your gameplay needs.
Of course, it would be nice to know when the ability has been activated, and how long it will be until you can use it again display on-screen.
For this we need UI!
Core Component: Ability Display
A crucial part of a video game is the feedback it gives--players need to know that they're using an ability.
While you can make a User Interface (often abbreviated to UI) element yourself, there is a pre-made template within Core Content that we can use to very quickly set up simple UI for our new ability!
When the Ability is in the Cooldown phase, it will darken the ability button and show the seconds remaining until the Ability is usable again.
To get this to work correctly with the Ability we made above, there are only a few steps:
-
In Core Content, search for the Ability Display object, and drag this into your Hierarchy. It can also be found in the category Game Components > UI.
-
If you now click this object from within the Hierarchy, the Properties tab will show a few custom properties that we need to change to set up the ability display.
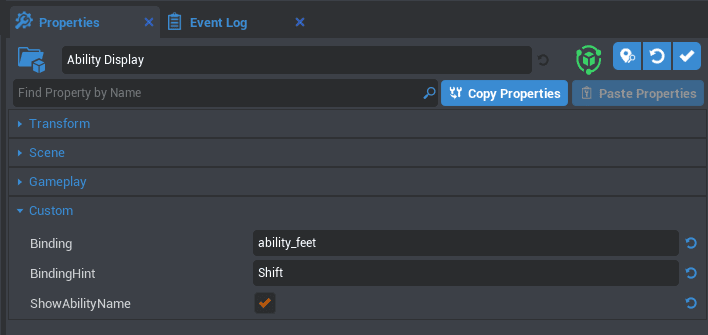
- Change the Binding property from
ability_primarytoability_feet. - Change the Text field to Shift , to stand for left-shift.
- Check the ShowAbilityName property, so that "Wave" will display over the button.
What is really the key here is the Binding property--this connects whatever ability is currently connected to that binding to the Ability Display.
- Change the Binding property from
-
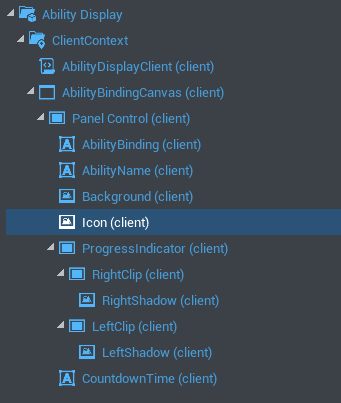
To make sure our icon symbol matches our ability, shift-click the AbilityBindingDisplay in the Hierarchy to expand all of the children subfolders.
Select the Icon object, and from within the Properties window, double-click the Image property to choose from all of Core's other built-in UI icons.
In my case, I chose the "Icon hand" image!
Now the UI element will update automatically once the ability is cast.
Congrats on creating your first ability! You are well on your way to making anything you can imagine a reality.
Networking for Multiplayer Games
Abilities themselves work in multiplayer games perfectly without any extra programming effort. If you made your own ability UI icon and did not use the Core Content template above, the UI will not update properly in multiplayer games. For the UI to update as the ability happens, the UI relating to the player's abilities must be placed in a Client Context folder.
This has already been done for us in the Core Content template, so no action is needed!
Client Context
Generally speaking, all UI related to the player should be in a Client Context folder.
Altering Properties the Easy Way: The Ability Object
Abilities can get more complex, and often you may want to tweak the values in an ability quickly without having to open up scripts.
To create a more advanced ability system and read more about Ability objects, read our next tutorial using abilities.
Examples
- Spellshock includes advanced abilities using ability objects.